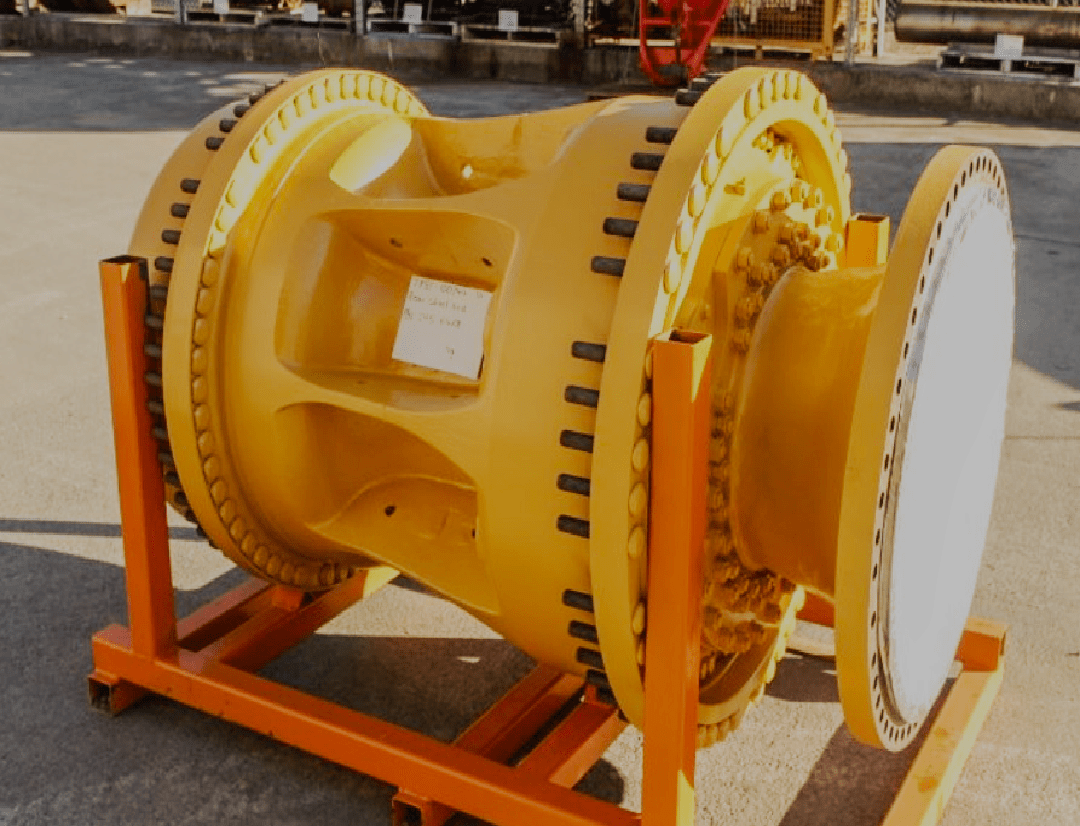
Key Benefits of Wheel Station Change-Out
- Reduce cost
- Reduce downtime
- Improve equipment reliability and lifespan
- Increase efficiency and productivity
- Improve equipment health, safety and compliance
- Enhance customer satisfaction

At BCMEL, the 785 wheel station change-out involves detailed maintenance, including removing and replacing components in Caterpillar's 785 truck wheel assembly. Tasks include tire removal, rim and hub inspection, and replacement of worn or damaged parts. Specialized tools, equipment, and expertise are needed to maintain the truck's performance and safety.

Regularly replacing worn tires and components helps maintain optimal traction and stability, reducing the risk of accidents and enhancing overall safety.
Installing new tires and components ensures proper alignment and balance, leading to smoother operation and better handling of the off-highway truck
By replacing tires and components before they become excessively worn or damaged, the overall lifespan of the vehicle is extended, reducing downtime and maintenance costs.
A well-maintained wheel station contributes to the truck’s overall reliability and uptime, allowing it to operate more efficiently and effectively in demanding work environments.
Performing wheel station change-outs as part of routine maintenance schedules helps ensure that the truck remains in compliance with manufacturer recommendations, maximizing performance and longevity.
Secure the truck in a safe and stable position, and gather all necessary tools and equipment.
Remove the old tire from the wheel hub assembly using appropriate lifting and handling equipment.
Inspect the wheel hub, rim, and other components for signs of wear, damage, or defects.
Install the new tire onto the wheel hub assembly, ensuring proper alignment and torque specifications.
Balance the newly installed tire to minimize vibration and ensure smooth operation.
Mount the wheel assembly back onto the truck’s axle, ensuring proper alignment and tightening of bolts.
Conduct a test run to verify the proper functioning of the wheel assembly and ensure there are no issues or abnormalities
Record the details of the wheel station change-out, including the date, mileage, and any relevant observations or recommendations for future maintenance
Clean up the work area and properly dispose of any old or damaged components.
Perform a final inspection of the wheel assembly to ensure everything is installed correctly and meets safety standards.

Park equipment on level ground and engage packing brake and chock the rear wheels.

Wear appropriate PPE’s for the task and do the risk assessment and explain to the new members.

Do your tag out and lock out system and take 2 minutes to think about the job before commencing.

Drain the oil from the final drive into a suitable container for storage or for disposal.

ack the machine and support the axle with stands and wooden parking.

Clean all the lines and hoses for the rear service brakes. Disconnect all of the lines and hoses of the rear service brakes. Cap the hoses or plug all the hoses in order to prevent contamination

Use an axle shaft installer in order to remove both rear axle shafts. Mark the shafts so the shafts can be reinstalled to the original location

Clean and dry the rear axle shafts, cover splined ends with plastic, and store the sun gear assembly in a clean and dry area.

Remove the mounting bolts that hold the final drive to the axle and leave four bolts to support it until the lifting equipment holds it before you remove them.

Use a suitable lifting device in order to remove the final drive, brake and wheel groups

Clean rear axle housing and wheel group assemblies using a Portable Angle Grinder and Abrasive Disc, removing weld splatter and slag if necessary.

Transfer fittings from the old wheel station to the new wheel station.

With the suitable lifting equipment install the new wheel station

Use the mounting bolts to secure the installation, tighten the bolts to CAT specification.

Connect hoses and tubes, use the shaft installer to fix the half shaft. And fix the final drive cover

Fill oil to the level, let Car tire to fix the tires and start to check for leakages

Physical assessment is done pertaining the job to be done.

Hazards heavy and sharp parts are identified

Appropriate P.P.E are worn and communication line established

Attach Tooling (B) to a hoist and position ring gear (5) and (6) for installation, weighing 254 kg (560 lb) as a unit.

Apply 9S-3263 Thread Lock Compound to eight bolts, install retainers, bolts, and washers for ring gear installation, and tighten to a torque of 125 ± 8 N·m.

Remove Tooling (B) from ring gear (5) and ring gear (6).

Use Tooling (B) to install inner carrier (3), as shown. The weight of inner carrier (3) is 137.5 kg (303 lb).

Remove Tooling (B) from the hoist.

Attach Tooling (A) to a suitable hoist. Use three 1F-7958 Nuts in order to attach Tooling (A) to planetary carrier (1).

Use Tooling (A) in order to position planetary carrier (1) and the O-ring seal for installation. The weight of planetary carrier (1) is 510 kg (1124.4 lb).

Use six bolts (2) and the washers in order to install planetary carrier (1) and the O-ring seal onto the wheel

Remove three 1F-7958 Nuts in order to remove Tooling (A) from planetary carrier (1). Remove Tooling (A) from the hoist.

Install the axle shaft and the sun gear. Refer to Disassembly and Assembly, "Axle Shaft - Install".

Install the tire and rim (rear). Refer to Disassembly and Assembly, "Tire and Rim (Rear) - Install".

Get free, no-obligation quick estimate for your engineering work, please provide detailed information so we can provide you proper information for the total work and an estimate of cost! Don’t worry if you miss something on the form, we’ll work with you to get the information we need.